Strawberry Shirt Day! Embroidery Experiment
Happy (Belated) Strawberry Shirt Day! (April 23rd). In this post, I will share my process for making a strawberry shirt for my partner, Elspeth.
Recursive Subdivision Rendering Algorithm
My initial plan was to make my shirt using code and my embroidery machine. The first step was to write some simple code that could convert an input image (of a strawberry) into something that could be rendered with my emboridery machine. My initial plan was as follows:
- Start with raster input image (i.e. grid of pixels) and a palette of (R,G,B) colors (i.e. embroidery floss colors).
- Simplify rendering of the raster input image using a recursive subdivision approach, essentially like what is described here, but based on the input palette. The idea is basically:
- Start with the whole image.
- To create render, divide the image into four quadrants and choose palette color that best matches the underlying pixels in that quadrant (for some sense of “best”).
- Then, do the same for each subquadrant and repeat, recursively subdividing until some desired level of accuracy (to the original image) is reached (or until the quadrants hit the lower bound of what my embroidery machine can render).
- The idea is basically that more detailed areas of the input image should get rendered in a more granular way, while also respecting the constraints of the embroidery medium (limited palette, limited granularity).
- Convert rendered image to an embroidery file using a library like PyEmbroidery.
- Test it using the embroidery machine!
I first tried implementing the rendering algorithm as described. As a base image, I chose to work with this simple clipart-style strawberry generated by Dall-E / ChatGPT:

After some fiddling and ChatGPT assistance, I came up with this implementation of the recursive subdivision algorithm:
def recursive_subdivide(matrix, palette, min_size_pixels, top=0, left=0, regions=None):
    if regions is None:
        regions = []

    height, width, _ = matrix.shape
    avg_color = average_color(matrix)
    closest_color = find_closest_palette_color_lab(avg_color, palette)
    current_variance = color_variance(matrix)

    if height <= min_size_pixels or width <= min_size_pixels or np.all(current_variance < 500):
        regions.append(((top, left, width, height), closest_color))
        return regions

    mid_row, mid_col = height // 2, width // 2
    recursive_subdivide(matrix[:mid_row, :mid_col], palette, min_size_pixels, top, left, regions)
    recursive_subdivide(matrix[:mid_row, mid_col:], palette, min_size_pixels, top, left + mid_col, regions)
    recursive_subdivide(matrix[mid_row:, :mid_col], palette, min_size_pixels, top + mid_row, left, regions)
    recursive_subdivide(matrix[mid_row:, mid_col:], palette, min_size_pixels, top + mid_row, left + mid_col, regions)

    return regions
Here’s what this looked like after running it on the above image with some random setttings and a simple palette (a light/dark red/green, black, white):

The black dividing lines wouldn’t actually show up in embroidery but give a sense of how the subdividing works. Honestly, the adaptive subdividing does not make too much difference for this image, which is obvious in retrospect given the art style. Still, the setup is successful in getting me something that could be tractable for embroidery, and might be interesting in the future for more nuanced images.
Doing the Embroidery
While I initially planned to do the embroidery with my embroidery machine, I called an audible and decided to try doing it by hand instead, since (1) I thought handmade would make the gift more special, and (2) I was not in the mood to figure out PyEmbroidery (I will come back to this sometime). If I had been planning to do “by hand” from the start, I probably could have approached things a bit differently – e.g. it would have been easy to use more colors since I was threading the needle many times regardless.
In any case, I moved ahead by hand and got a nice palette of embroidery floss from the local sewing store Gather Here. The shirt I used was a basic vintage tee I found at We Thieves. I knew that the t-shirt would need a stabilizer, so I picked up Sulky Fabri-Solvy. I wasn’t initially sure how I would transfer the design; however, I discovered online that it’s easy to print directly on Fabri-Solvy, so I did that and stuck the design to the shirt:
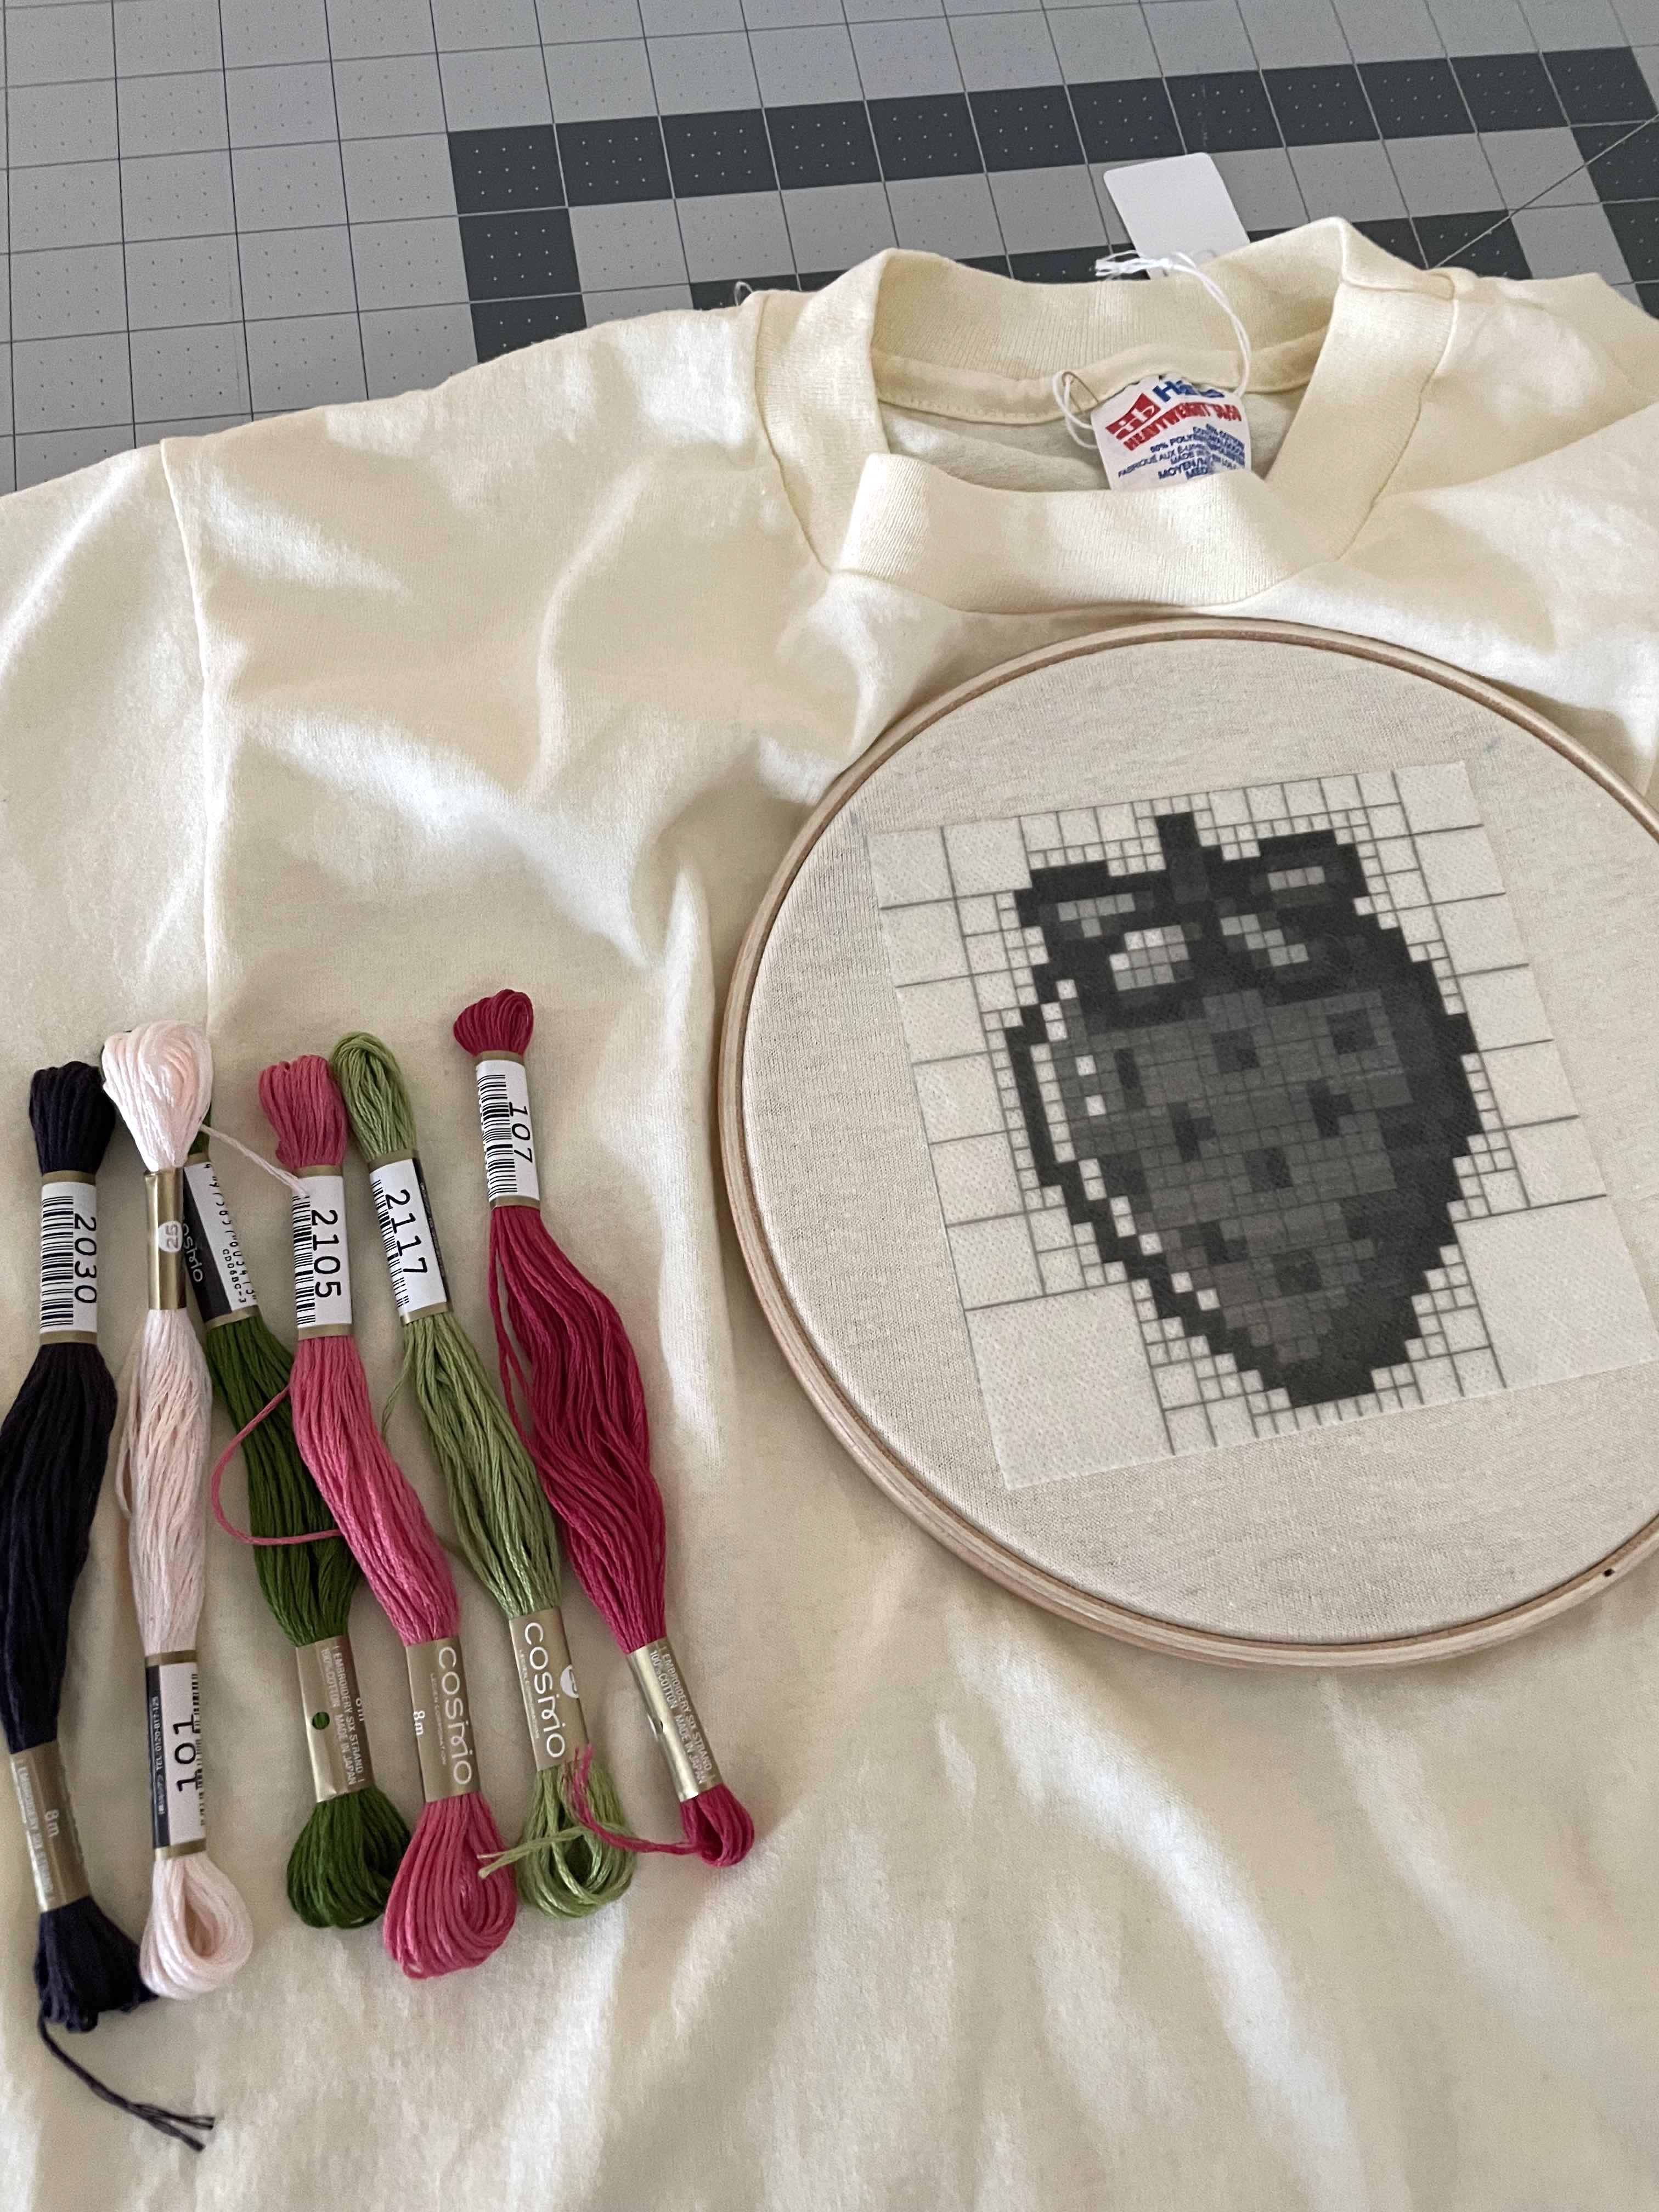
The actual embroidery took a while but was fairly straightforward. I didn’t wind up exactly following the recursive subdivision algorithm in my satin stitch fills; I just tried to keep a balanced look for the fills of the main strawberry color. Something I was not sure about was outlining; I wound up adding a backstitch outline at the edge of the piece, and in a few spots in the interior that seemed appropriate. I am not sure what would be best for an algorithmic version of this. I also experimentally discovered how long I could make my satin stitches before it became difficult to keep tension; there is one spot on the border where it would have been good to go shorter probably.
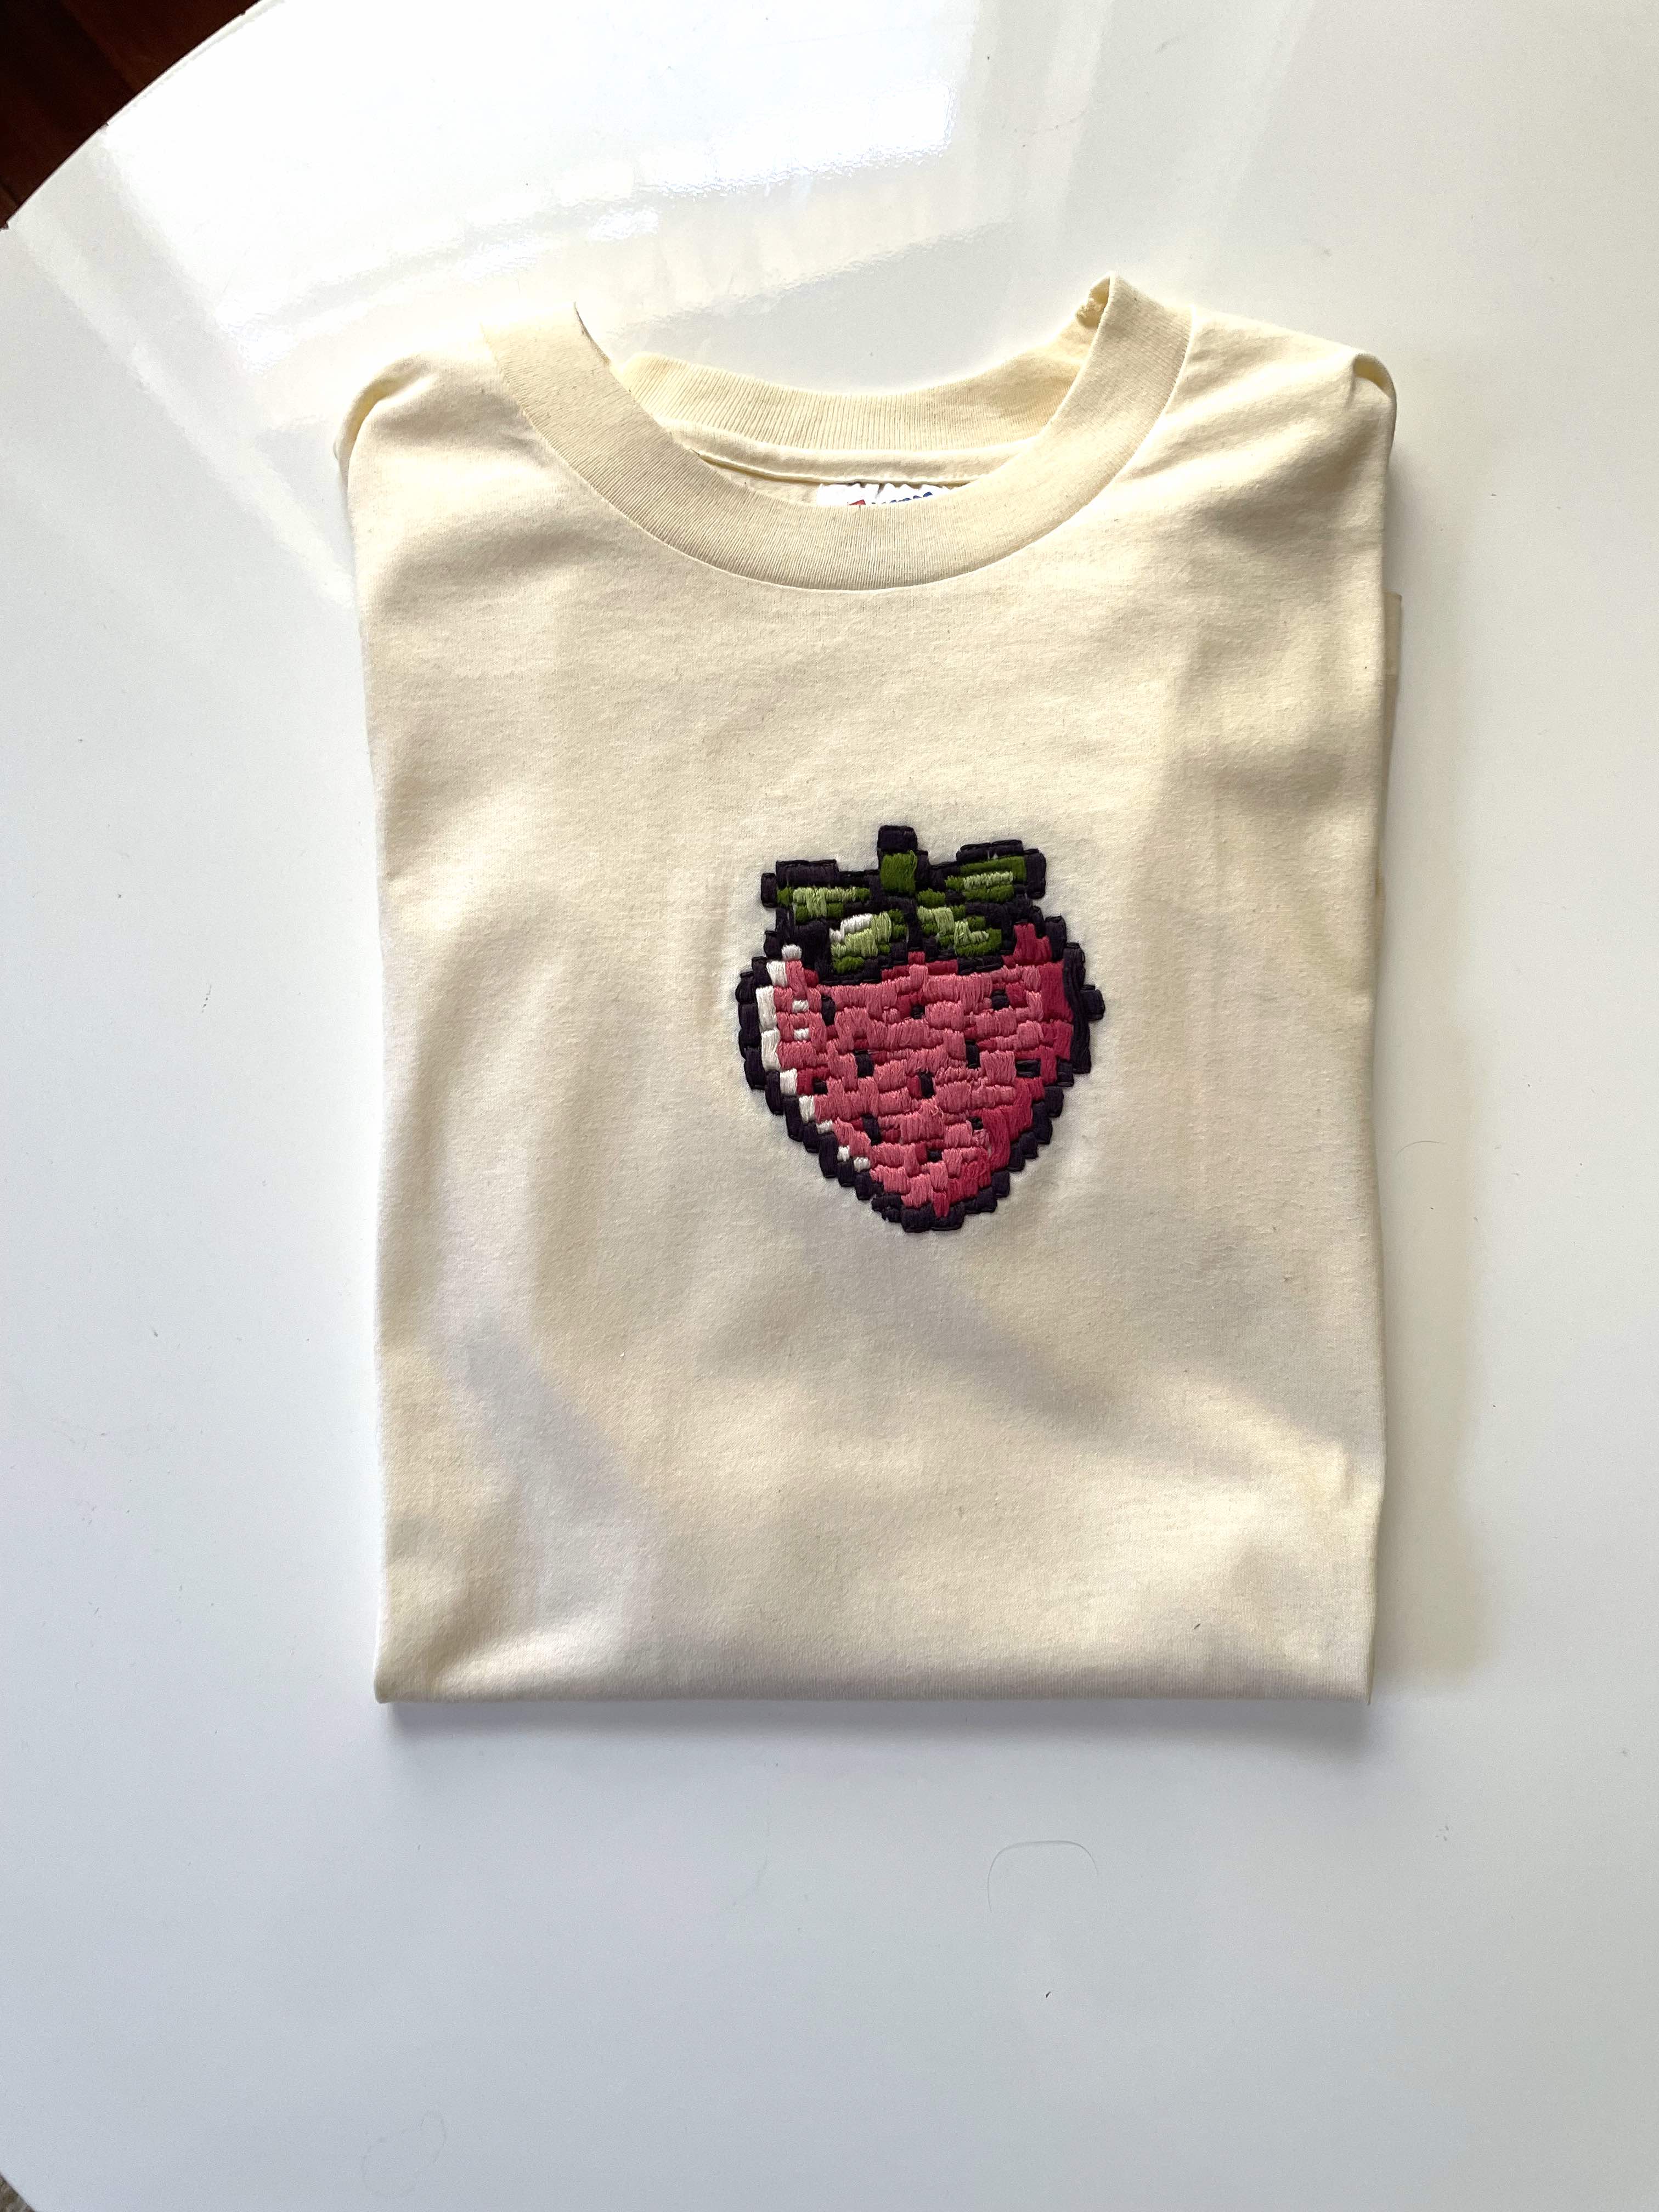
After I completed the embroidery, I rinsed away the Fabri-Solvy without issue in my sink. I will definitely be using the Fabri-Solvy process again as it was very convenient and easy. Here was the final result after further washing, drying and ironing:
Here is a close-up:
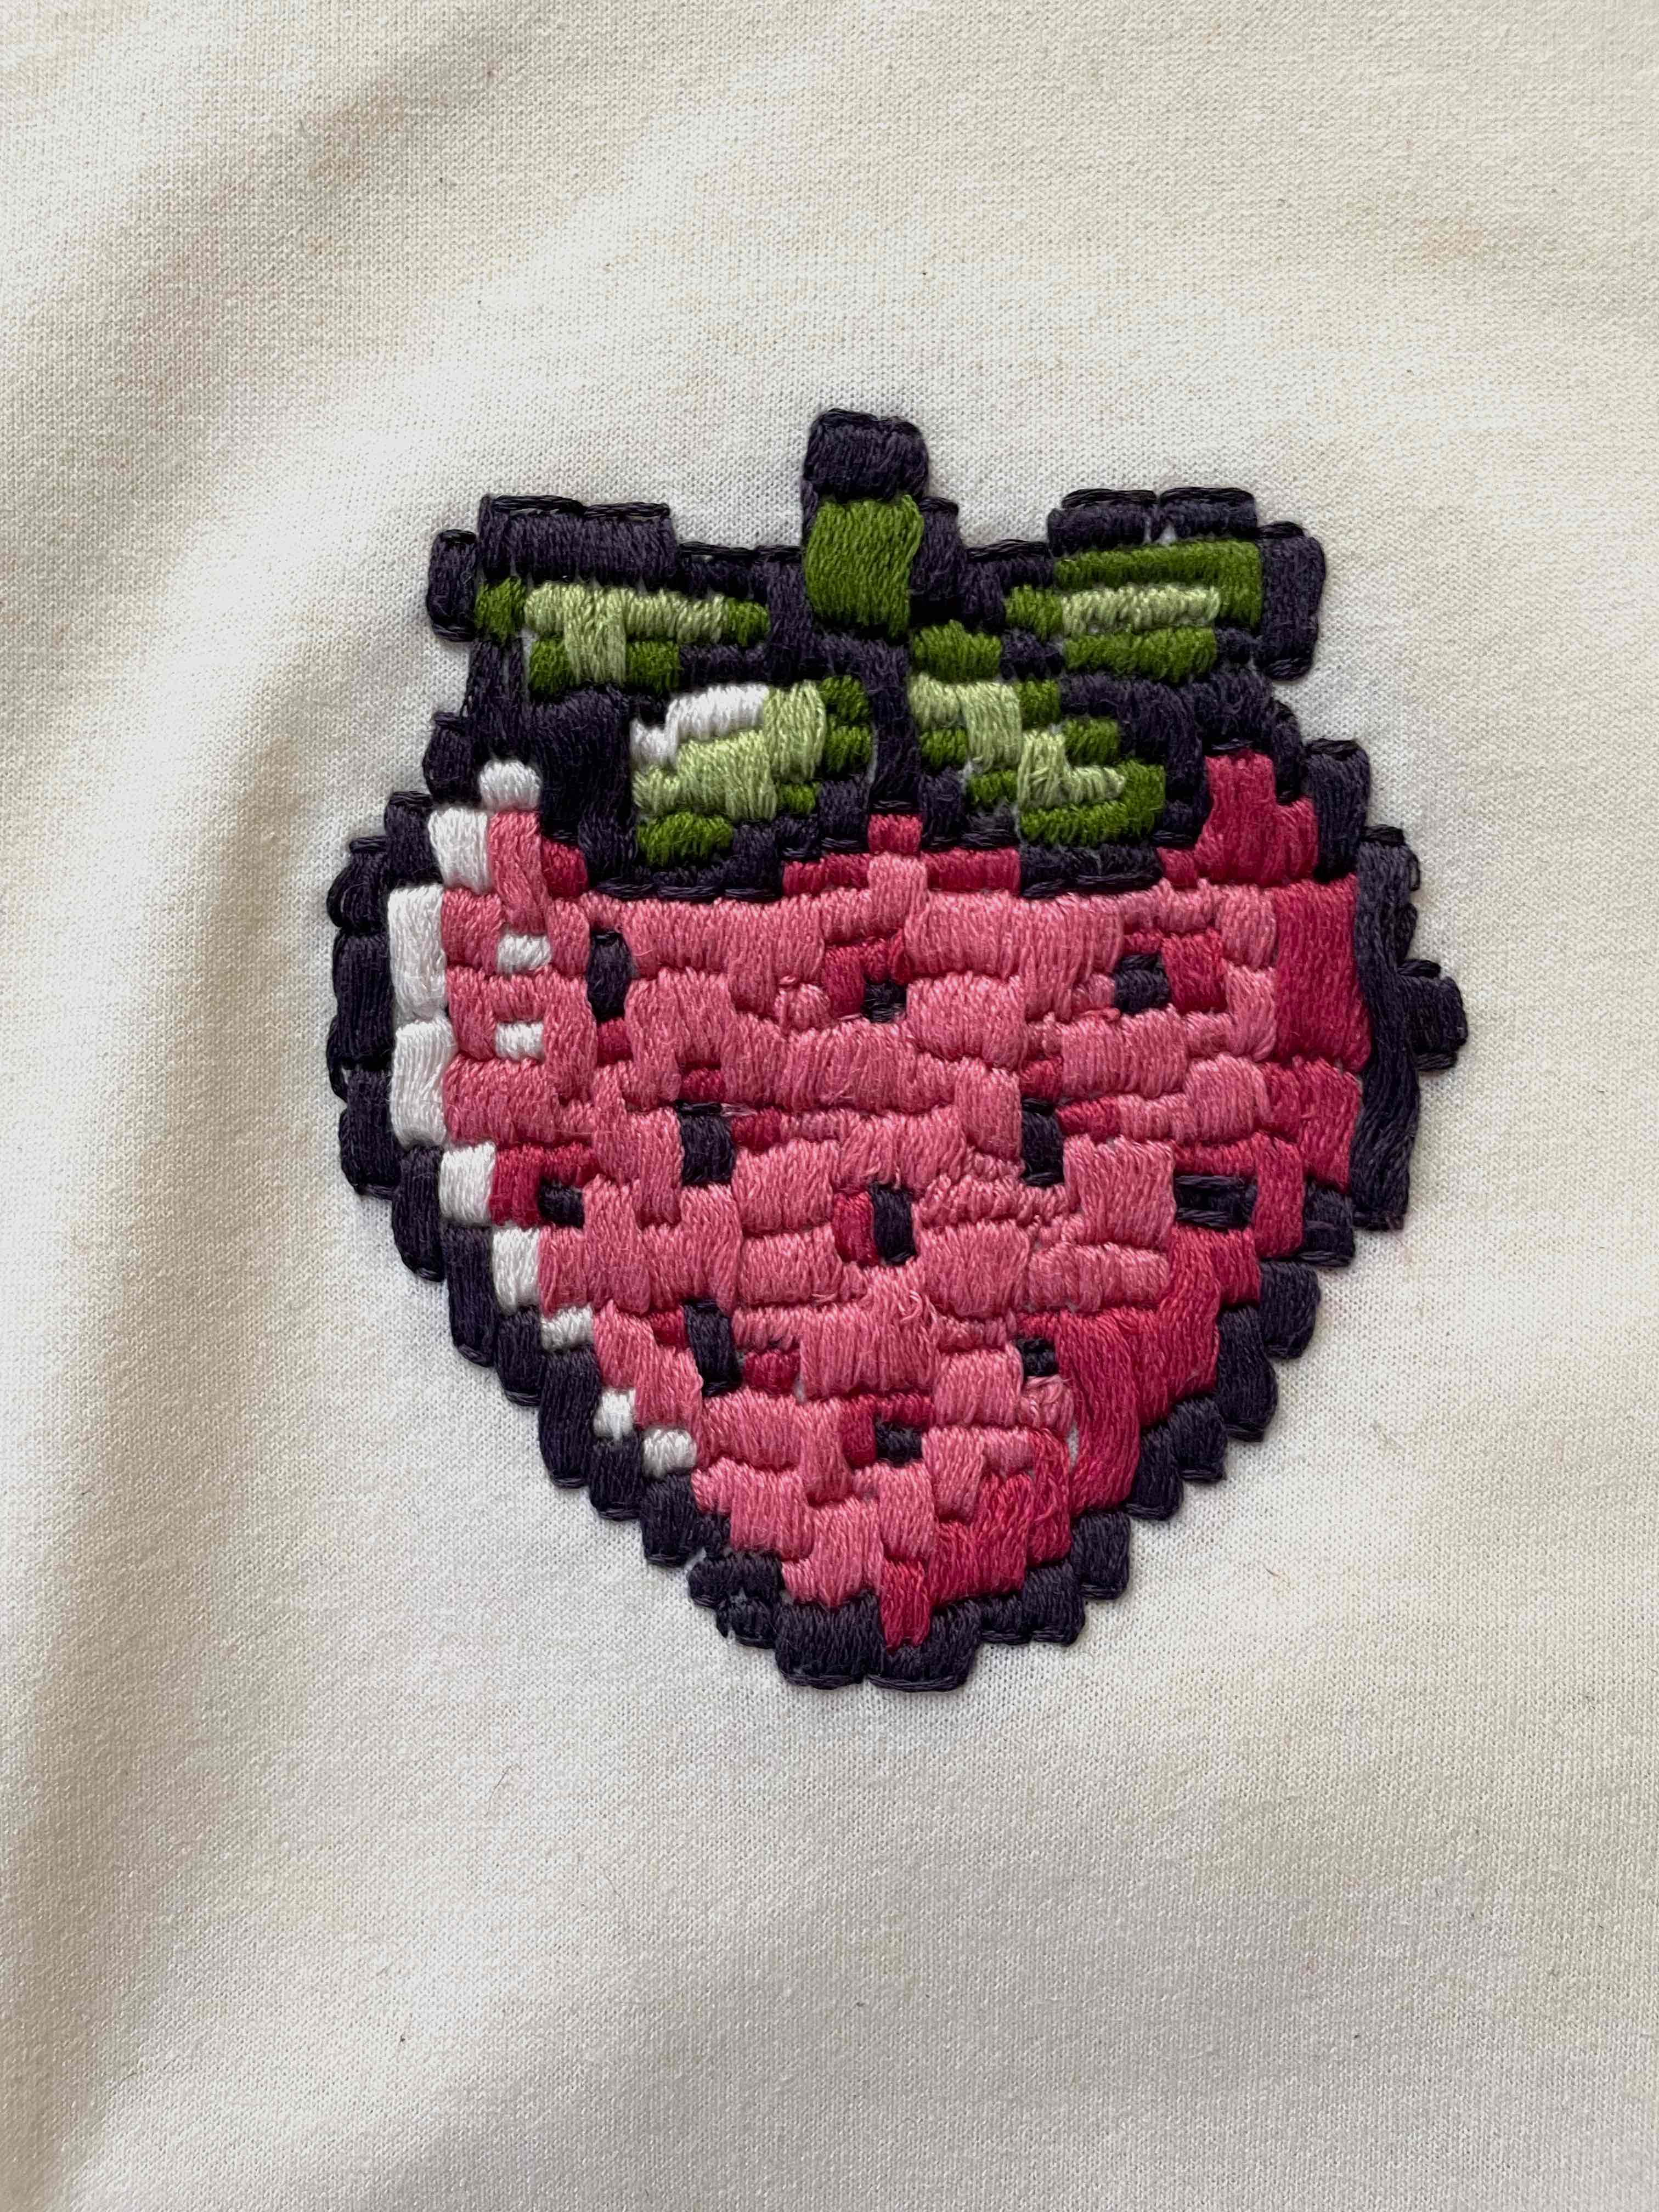
Overall, I am happy with how it turned out! One thing you may notice is that the image became a bit more scrunched after I un-hooped the shirt, compared to the hooped design. This is not surprising in retrospect, but I didn’t think about it at the outset. I am not sure if there is a better way to account for this either in the design process or the hooping, or if it’s just an inevitability of embroidery on stretchier fabrics. I did adhere the design before stretching in the hoop which I’d think would be helpful. I will have to do some more research on this.
Conclusion
I gifted my strawberry shirt to Elspeth and I think she liked it! I hope you will join us for Strawberry Shirt Day next year.
EDIT: Elspeth’s response to this post: